|
Install our Barcode ASP.NET Web Control and start Microsoft Visual Studio. Create a new ASP.NET Web Application after that. |
| |
|
| | |
|
Open the file 'Web.config' and insert an HTTP handler. |
| |
The necessary HTTP handler is below:
<httpHandlers>
<add verb="*" path="BarcodeGeneratorHandler.ashx" type="Barcodes.Barcode.BarcodeGeneratorHandler,Barcodes.BarcodeWeb"
/>
</httpHandlers>
Build Web Application.
|
| | |
|
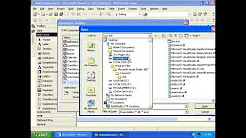
Register Barcode ASP.NET Web Control in your ASP.NET Web Application. |
| |
Open Toolbox for that.
Right-click to open the context menu and select 'Customize Toolbox'.
Then switch to the .NET Framework Components tab and click the Browse button. Then select the file Barcodes.BarcodeWeb.dll
Now the Barcode ASP.NET Web Control is present on the Web Forms tab. You can put it on the form.
|
| | |
|
Adjust the properties of the Barcode ASP.NET Web control. |
| |
Build Web Application.
|
| | |
|
Start your Internet Browser. |
| |
Type the address of your web form, you should see the barcode image.
|
| | |